Broccoli Tots! Calling all Veggie Haters-this ones for YOU!

I grew up eating very healthy. So naturally, the second I started earning money as a teen babysitter I bought Swedish fish, fried bread dough, Ben & Jerrys, wine coolers and acid washed jeans. I loved the greasy food served at our state fair. My broccoli tots kinda marry my teen palate and my adult one—green veggie obssessed adult whose inner teen is a lover of grease. These low carb, gluten free, broccoli tots are a great way to sneak in a green veg for kids and veggie haters. I love them on their own as snack or served along with eggs in the morning or a big salad later on in the day!

totsmain.jpg
These tots are just 3 ingredients and some spices!

These tots are just 3 ingredients and some spices!

Ingredients and Tools

1 head or 1 bag of pre-chopped broccoli

1 cup of shredded mozzarella

1 Egg

1/2 Teaspoon of each: powdered garlic, powdered onion, smoked paprika and sea salt

Olive oil for sauteeing

Knife and cutting board OR food processor

Measuring cup and measuring spoons

Mixing bowl

Frying pan

Parchment paper and baking sheet pan

*** My friends that don’t eat cheese have reported that the Whole Foods brand plant based shredded Mozzarella is the best for melting.

***My friends that don’t eat eggs have shared that the egg replacer brands such as Ener-G, Just and Neategg work great in baking. And several more shared they use the homemade Flax egg replacement for baking. 1 tablespoon of ground flaxseed meal and 3 tablespoons of water, stir well, let it gel in the fridge for 15 minutes, stir again, add to your recipe. This flax egg is a 1:1 ratio of flax egg to real egg.

Instructions

-Pre heat oven to 400

-Cut your broccoli into little tiny, ity-bity pieces. If you are using a full head of broccoli discard most of the stem and use the florets. If you have a food processor let the machine do the chopping for you!

-Saute your broccoli on medium high heat with olive oil. Stirring frequently until it has begun to lightly char.

-While the broccoli cooks grab a mixing bowl and add your shredded mozzarella and your seasonings.

-In a separate bowl beat one egg.

-When the broccoli is done add it to the cheese/seasonings mixture and now add the egg and mix all ingredients together well.

-Using a tablespoon scoop out your tot mixture onto your parchment lined baking sheet.

-Using your hand or spatula very gently flatten the tots-just enough to flatten the curve left by the tablespoon.

-Pop the tots into the oven and set a timer for 20 minutes. At 20 minutes flip your tots. Now set another timer for 15 minutes to cook the other side of your tots. Granted cooking times vary slightly from oven to oven.

-When done, let them cool just a touch then slice in half and enjoy! Store in an airtight container in the fridge-if they last that long-most folks gobble em all up immediately!

Chop the broccoli florets super tiny or let a food processor do it for you.

Chop the broccoli florets super tiny or let a food processor do it for you.

I stir fry my chopped broccoli in olive oil until a few portions have started to char as seen in this photo.

I stir fry my chopped broccoli in olive oil until a few portions have started to char as seen in this photo.

Be sure to mix the ingredients well.

Be sure to mix the ingredients well.

Use a tablespoon to make perfectly formed tots then pop each one onto your parchment lined baking sheet.

Use a tablespoon to make perfectly formed tots then pop each one onto your parchment lined baking sheet.

These are the tots before I gently flatten them.

These are the tots before I gently flatten them.

These are the tots after they have been gently flattened and ready to be put into the oven.

These are the tots after they have been gently flattened and ready to be put into the oven.

Don’t forget to set that timer to remind you to flip your tots.

Don’t forget to set that timer to remind you to flip your tots.

Enjoy!

Enjoy!

A Health Coaches version of Cool Whip! Vegan, Sugar Free, Low Carb & Takes 1 minute to make.

When I was a kid my Grandmother always had Cool Whip in her fridge. I would quietly sneak into the kitchen and eat as much as possible direct from the container and then smooth over the top to hide the fact. Occasionally, I would peel back the lid only to find last nights dinner in the Cool Whip container as my Grandmother recycled and reused as well as cooked once, ate twice long before it was a movement!

This Whipped Cream is the perfect compliment to berries, pop a scoop on top of a sqaure of dark chocolate or serve with the chocolate pudding or chia pudding I have on this website. Consider it a great way to avoid sugar while getting in anti inflammatory good fats!

1-4.jpg


Ingredients and Tools

1 can of full fat coconut milk chilled overnight in the fridge

1 teaspoon of vanilla extract

1 large glass mixing bowl chilled over night in the fridge

Handheld mixer-chill the whisks in the fridge overnight


Directions

-The day before you desire to make this Kool Whip delight put the can of full fat coconut milk, the glass bowl and the whisks into the fridge.

-When it is time to make the whipped cream use a knife to cut a hole in the center of the now hardened coconut milk.

-Pour the liquid coconut milk out (use it for smoothies). Do not get the liquid aspect of the coconut milk in your chilled glass bowl.

-Use the knife to extract the hardened coconut milk into your chilled glass bowl.

-Add 1 tsp of vanilla extract.

-Now whip using your hand held mixer with chilled whisks attachments for about a minute or until you love the texture and consistency.

chill your full fat coconut milk, whisk attachments and glass bowl overnight in the fridge.

chill your full fat coconut milk, whisk attachments and glass bowl overnight in the fridge.


cut a hole in the hardened coconut milk to extract the liquid coconut milk-set aside the liquid as we are only using the hardened coconut milk.

cut a hole in the hardened coconut milk to extract the liquid coconut milk-set aside the liquid as we are only using the hardened coconut milk.

whip your hardened coconut milk after you have added the vanilla until you reach the desired texture.

whip your hardened coconut milk after you have added the vanilla until you reach the desired texture.

remember the liquid you extracted is not coming to the Cool Whip party-save it for smoothies.

remember the liquid you extracted is not coming to the Cool Whip party-save it for smoothies.

ENJOY!

ENJOY!


FAT BOMBS!!! (no bake, paleo, vegan, gluten free, keto, hi fat/lo carb/hi protein)

1-12.jpg

When you switch over to a keto or low carb diet your body may stop running on glucose and start running on fat: both dietary and body fat. These delightful lil snacky sweet treats are a great way to get in more good fat for fuel when you stop being a sugar burner and start being a fat burner.

1-3.jpg

INGREDIENTS

1 1/2 cup almond flour

1/2 cup melted coconut oil

3/4 cup room temp almond butter with no sugar added

1 tbsp vanilla extract

1/4 cup raw cacao nibs

1/3 cup shredded, unsweetened coconut

You will also need parchment paper, mixing bowl, small baking pyrex, measuring spoons, measuring cup, spoon.


DIRECTIONS

-Begin by measuring out and adding your dry ingredients to a mixing bowl: almond flour, cacao nibs and coconut.

-Now measure out your almond butter.

-Don’t worry about residual almond butter in your measuring cup just go ahead and measure out your coconut oil and melt. The residual almond butter and coconut oil will mix together well and leave you with a clean measuring cup!

-Add in your vanilla.

-Now mix well.

-Time to line a small baking dish with parchment paper.

-Pour your fat bomb batter into your lined baking dish.

-Cover baking dish with air tight lid or saran wrap and put it in the fridge for at least two hours to set.

1-6.jpg
1-9.jpg

-Once your batter has formed into a hard surface pop it onto a cutting board and cut into bite sized pieces.

-Place these bite sized treats in an airtight container and put them in the fridge.

-Must be kept refridgerated or they melt. Warning they don’t travel well so enjoy them at home!

1-10.jpg


Paleo Chili (low carb, gluten free)

I found this recipe years ago in Paleo Magazine, a mag I love! I have adapted and reworked it over the years so here is the crossbred version of Coach G and Paleo Mags PALEO CHILI!

This a low carb way to feel like you are getting in a starchy, hearty meal! Paleo Chili may not be photogenic but I can gurantee it is ADDICTIVE!

1.jpg

INGREDIENTS

-2 spaghetti squashes.

- 15 oz can of crushed tomatoes.

-tomato paste.

-chili seasoning.

-cumin.

-sea salt.

-onion.

-chicken thighs or tenders or breast. (or tofu if you want to make this plant based vegan.)


DIRECTIONS

Coach G’s note: I typically do not make this all on one day as waiting for the spaghetti squash to cool would take this recipe out of the fast-easy-cheap zone that I live in. I will usually roast my spagehtti squash in advance when I am using my oven for something like my paleo muffins and then scrape it and toss the spahgetti into gallon size freezer bags and keep in my freezer until the craving for Paleo Chili hits!


-Roast 2 spaghetti squashs on any glass lasagna pan or metal cookie sheet at 375 until you can stick a butter knife through it. The pan/sheet is needed as sometimes a spaghetti squash can ooze liquid and that would be a first class pain in the a$$ to clean that off the floor of your oven. One of my coaching clients asked me what is the trick to get it to cook- I said stab it like a serial killer then put it on a pan and walk away!

-Set aside and let it cool, trust me you don’t wanna handle hot spaghetti squash.

-Once spaghetti squash is cooled, cut in half, then half your halves.

-First pull out the middle section with the seeds and discard. I usually do this with a fork.

-Grab and fork and scrape the entire interior to grab all your spaghetti. Toss into bags to freeze or big glass bowl to prep with the other ingredients.

-Boil any chicken of your choice. I usually use thighs. I don’t bother pan frying or roasting as the chicken, once combined with all the other ingreidents will take on incredible flavors. You know your chicken is done when your meat thermometer reads 165 F/74 C.

-You can opt to just skip the chicken or you can add crumbled firm tofu to your dish. No need to pre-cook the tofu as it will cook when you bake the chili. If you opt for tofu: drain the package and let the tofu sit on paper towel for an hour to get all excess liquid from it.

-While your chicken is boiling chop a sweet white onion and sautee in olive oil. When done add to your bowl of spaghetti squash.

-chop your cooked chicken on a designated plastic meat cutting board. Add to your spaghetti squash in a large glass bowl.

-Add in your 15 oz can of tomatos, I usually strain about 1/4-1/2 of the juice from it first to keep a firm chili.

-Add in 1/2 of a can or about 2 tablespoons of tomato paste.

-Now time to season. Add all to your spaghetti squash. I use about 2 teaspoons of chili powder, 1 teaspoon of cumin and 2 teaspoons of sea salt.

-Mix using a large wooden spoon your spaghetti squash, onions, chicken/tofu, tomatoes, tomato paste, seasoning.

-Transfer your mixure into a glass lasagna pan and bake at 375 for about 30 minutes. Serve hot just as is or add sliced avocado to each serving. ENJOY!


Your cooked spaghetti squash quartered and ready to have the center part de-seeded looks like this.

Once de-seeded your squash is ready to be scraped into a glass bowl with a fork.

1-7.jpg

While the onions sautee its a great time to boil the chicken.


Sunday Soup

I make this soup every sunday in my crock pot cuz it is an immune boosting, gut healing, low carb meal. I keep the soup frozen in mason jars for weeknights when I don’t wanna cook. It is perfect with either the keto rolls or my low carb crackers.


INGREDIENTS for a 3.5 Quart Crock Pot

-4 organic chicken thighs, skin on and bone in. Bone in is essential for a hearty immune and gut boosting broth.

-2 zucchinis.

-1 head of fresh kale.

-3-5 stalks of celery.

-2 large sized carrots.

-1 small onion.

-3-8 cloves of peeled garlic depending on your mood.

-A thumb size piece of ginger, peeled.

-Fresh thyme.

-Sea salt and Pepper.

-Water.

-You may choose to also add in 1 tablespoon of apple cider vinegar because it pulls more nutrients especially collagen out of the bones.


KITCHEN TOOLS

-Crock pot, I use a 3.5 Quart one.

-A plastic cutting board dedicated for meat. Never share your meat cutting board with your veggies cutting board or on any porous cutting board such as a wooden one.

-Knife.

-Tongs.


DIRECTIONS

-Chop your carrot, celery and onion into bite sized pieces and lay in your crock pot.

-Place chicken on top of these chopped veggies.

-Add salt, pepper, your peeled garlic and ginger. I like to keep my garlic in whole, peeled clove form as it becomes soft and sweet after cooking for 24 hours in the crock pot. I also peel and chop my ginger into nickle to quarter size pieces as I really enjoy the water chesnut texture it takes on after being cooked for 24 hours.

-Fill the crock pot almost full of water. If you are adding apple cider vinegar now is the time.

-Set on low for 24 hours and go enjoy your day!

-At the 22-23 hour mark use your tongs to pull the chicken and bones out of the crockpot and place on your meat dedicated cutting board. Remove and discard of the bones and chop chicken. This is great time to remove your cluster of thyme as well.

-Add your deboned, chopped chicken back in. I typically salt the chopped chicken before adding it back in.

-Chop your zucchini and de stem and chop your kale into bite sized pieces and add in to cook for the final hour or two.

-At hour 24 your gorgeous Sunday Soup is ready. Serve immediately or allow it cool to room temp before filling up mason jars 3/4 full. Never fill a mason jar to the top that you plan on freezing as many foods expand and will crack your mason jars in the freezer. When you are ready to enjoy your soup you can pull out a mason jar and defrost that morning!

Always de-stem kale before cooking or using in a salad. The stems are often too fibourous to enjoy the texture of. The stems are great in juices though.

My Sunday Soup is the perfect combo with my almond flour crackers. You can find the recipe here on this website. Whenever you make a kale salad always massage/tenderize the kale for a minute or two with olive oil, sea salt and an acid (like lemon juice or apple cider vinegar) before adding your other ingredients.


-


BREAKFAST COOKIES (YES, I SAID COOKIES FOR BREAKFAST!)

INGREDIENTS

For 6 Cookies

-1/4 cup Gluten Free steel cut oats.

-1/4 cup raw cacao nibs.

-1 tablespoon ground flax seeds.

-1 tablespoon raw coconut flakes, unsweetened.

-3 tablespoons unsweetened nut butter.

-1 tablespoon vanilla extract.

-1 very ripe brown spotted banana.


DIRECTIONS

-Pre Heat Oven to 350 degrees.

-Grind your steel cut oats in a coffee grinder to make a rough flour/powder.

-Put all dry ingredients in a bowl.

-In a blender or cusinart liquify your banana. Then add vanilla and give a quick swirl.

-Add the banana/vanilla as well as the nutbutter to your dry ingredients and mix well.

-Spoon onto a parchment paper lined cookie sheet.

-Soften and shape into desired cookie size.

-Bake for about 15-20 minutes or until your knife comes out clean.


COACH G NOTES:

Steel cut oats are a power food full of fiber and protien and will keep you feeling full for hours.

Raw Cacoa Nibs are super rich in iron and calcium. Plus they are natures anti-depresssant.

Bananas are full of nutrients and I consider them a superfood. Plus they make all my healthy swap recipes sweet!

Nut Butter is full of protein and good fat which is the combo key to keeping blood sugar stable! Keeping blood sugar stable is essential for mood, energy and weight.

Flax Seeds are full of omega 3 fats (the good fats) and are an incredible source of fiber.

Coconut is also high in fiber and good fat and is known to be a bff to your gut health.

And this my friends, is why these cookies are so good for you we serve em for breakfast!! They are also delightful treated as you would a granola…crumble onto greek yogurt or chia seed pudding!


My House Dressing for salads, roasted veggies and fish! (easy breezy)

INGREDIENTS

1 lemon or lime…either bright form of citrus will be perfect.

1 handful of fresh mint.

1/4-1/2 cup of olive oil depending on how intense or mild you want your dressing to be.

1/2 shallot.

1/4 teaspoon of sea salt.

DIRECTIONS

In a blender or food proceesor toss the juice of one lemon or lime, pull the leaves off the stem of your mint, toss the leaves in, peel and rough chop 1/2 shallot, toss in the salt and start with just 1/4 cup olive oil. Blend well. Taste. Do you need more olive oil or is it perfect?

Pour into a recycled jar with lid. Shake before using. Keeps 3-5 days in the fridge.

This is so fabulous over salads and gorgeous over roasted veggies and fish!

Chocolate Pudding! (sugar free, paleo, gluten free, easy AF)

#HealthySwaps are one of the key principles of The Masterson Plan approach to helping peeps get healthy. No one ever made a lifestyle change using deprivation. Just cuz I help you break up with sugar doesn’t mean you can’t enjoy sweet treats, we just help you choose the healthy swap versions like this pudding. If you grew up wanting those jello chocolate pudding cups for snack, boy have you come to the right place!


Ingredients

(Makes 4 servings)

1 very ripe avocado

2 very ripe bananas

1/4 cup of raw cacao powder

3 tablespoons of vanilla extract

1/4 cup of very strong black coffee or decaf coffee (room temp)

3 tablespoons of melted coconut oil

1/4 teaspoon of sea salt

unsweetened shredded coconut flakes and a tablespoon of hemp seeds to top


Directions

In a food processor toss the peeled bananas and de-pitted and peeled avocado.

Add in all the other ingredients and blend until super creamy.

Spoon into easy grab n go jars. I used recycled and washed ghee jars.

Top with coconut flakes.

Refridgerate for a few hours before enjoying.

Keeps in the fridge for 3-5 days!

  • you can use a vitamix or blender but the food processor makes it much easier to blend not to mention clean.


Almond Flour Crackers! (keto, paleo, gluten free, delish, easy)

The other day my friend, Mey came over and I thought I would be hot sh!t and wow her with MY homemade almond flour crackers. Well… she showed up with HER almond flour crackers and I begged her for the recipe! Thank you to Mey Diaz…friend, amazing dog mom, jack of all trades and now master paleo baker! I share with you Mey’s almond flour crackers. They are easy to make. Gluten Free. Perfect for a low carb approach to eating.

INGREDIENTS

3 cups of Almond Flour

2 Eggs

1/4 cup of melted Ghee or Butter

1 1/2 teaspoon of baking powder.

1/2 teaspoon of Sea Salt

Maldon Salt to top

Additional ideas: add Everything But The Bagel Seasoning to the mixture instead of maldon salt to top (this is how I do them) or add Toasted Seasame Seeds for a Pretzel like taste.


In addition to a measuring cup, measuring spoons and bowl you will need

A Baking Sheet

Parchment Paper

You may choose to use a rolling pin over the parchment paper to achieve the thinness you desire from your cracker. An empty booze bottle (ahem) works too.


DIRECTIONS

You can choose to divide your ingredients in half and do two flavor profiles if you like. 1/2 gets the maldon salt topper the other half gets the everything but the bagel seasoning mixed in. This is my approach so I have more than one way to enjoy my almond flour crackers! Start by pre-heating your oven to 375.

-In a bowl beat your eggs with a fork.

-Now add in your almond flour baking powder.

-Now melt your ghee or butter in a small pot and add in.

-Add your sea salt.

-If you are doing Everything But the Bagel OR Sesame Seeds add them now.

-Mix well with your hands. The consistency will feel like play doh.

-Cut your parchment paper to fit your baking sheet. Does not need to be perfect.

-Plop your dough into center of your parchment paper. I like to keep my parchment paper on my large wooden cutting board for this portion then move it when done to the baking sheet. Fold your parchment paper in half over the dough and use the top piece to smooth out the dough.


-Now that your dough is shaped out on your baking sheet/parchment paper grab a knife or a pastry/pasta blade and run it under water. Like your hands keep the knife a bit wet so the dough does not stick to it. Now cut your raw dough into crackers! Mey did long flatbread looking crackers and I do a traditional square cracker shape.

-Sprinkle some maldon salt on top if you are not using the everything but the bagel seasoning.

-Pop into the oven at 375 for 10-15 minutes. Every oven runs differently so really watch them starting at the 10 minute mark. If you choose at the 10 minute mark you can add a super thin layer of butter or ghee on top if you are doing the everything but the bagel version..don’t add to the maldon salt.

-Once done, let em cool, then break them up and enjoy just as they are or with a soft cheese or hummus or cream cheese. I love a handful with a LaCroix seltzer! Tag @TheMastersonPlan so I can see how yours turned out!


And if you want to follow Mey’s inspiration for being as healthy as she can be then please find my furry God children on instagram @juniandmochi

My batch at the ten minute mark I did a thin layer of ghee on top and cooked for about 7 more minutes. I made mine with everything but the bagel seasoning.


Chia Seed Pudding!!! Takes ONE MINUTE to make! No sugar! Vegan! Gluten Free! Paleo!

Thank You to my amazing and dedicated client and future podcaster/writer, Bridget Rodgers for this gorgeous photo of the chia seed pudding recipe!

This chia seed pudding can serve as an amazing breakfast or snack and takes as long to make as it does to set up your coffee maker. Not even kidding. Great healthy swap!

You just need a blender and a glass container with a lid to store it in!

In your blender toss:

1 cup of frozen rasberries.( My clients have found other berries don’t translate sweet enough!)

1 can of coconut milk. Make sure its full fat and no sugar. I even use a can of coconut cream sometimes when I want it to be extra decadent and creamy.

1/2 cup of chia seeds.

1/2 cup of water.

4-5 tablespoons of vanilla extract. Yes you read that correctly. Trust me you will want it. I use a half a bottle of the Trader Joes brand each time.

A pinch of sea salt.

Blend. Blend. Blend.

Pour into your glass container, cover with lid and put it in the fridge overnight. Its super easy to bring to work by recycling and reusing your ghee jars or nutbutter jars.

KETO ROLLS!!!!! (low carb, paleo, gluten free, keto BREAD)

I met Norma Hartie when we both volunteered with the same pug rescue group. When Norma joined the Sober October group that I hosted she wowed us all on our private facebook page with many of her low carb recipes. Her keto rolls are perfect for anyone getting off flour who is craving the taste and texture of bread. And guess what else, eat three of em and you will take the best poop of your life. My website wouldn’t be complete without having Norma guest post here!

You can find more of Norma’s delish low carb recipes at www.normalehmeierhartie.com/blog/

Direct from Norma Lehmeier Hartie’s Kitchen-

If you are on a Keto/low carb diet, want to cut out or down on carbs or gluten but are worried about missing bread, make these suckers and you’ll forget all about flour-based bread!

I make a variety of Keto-friendly rolls, but these are my favorite because they are light and very neutral tasting, so they are good with just about anything. If you want them for burgers, shape them for that. Dinner rolls? Done. I’ve used these for anything from sandwiches to dip for my stews.

If you are unfamiliar with psyllium husk powder, it’s a super healthy carb that’s all fiber—good to help you go and for heart health.

Finally, if you have dogs, feed them the egg yolks! Just microwave them for about a minute and add it to their food for a healthy and delicious treat!

Ingredients

1¼ cups almond flour

5 tbsp ground psyllium husk powder

2 tsp baking powder

1 tsp sea salt

2 tsp cider vinegar

1 cup boiling water

4 eggs whites from room temp eggs

2 tbsp sesame seeds (optional)

Instructions

An hour before you intend to cook, put your eggs out on the counter. The rising and texture of these rolls will be fab if your eggs are room temp.

Preheat the oven to 350°F (175°C). Mix the dry ingredients in a large bowl.

Bring the water to a boil and add it, the vinegar and egg whites to the bowl, while beating with a hand mixer for about 30 seconds. Don't over mix the dough, the consistency should resemble Play-Doh.

Moisten hands and make 6 pieces of the dough. Place on parchment paper on a sheet and bake on lower rack in the oven for 35-45 minutes, depending on the size of your rolls. They're done when you hear a hollow sound when tapping the bottom of the bun.

*** From Galadriel…a few clients have reported their rolls became soggy the next day. I find if I split my down the middle in the final 15 minute they are perfection. I keep mine in a zip lock bag in the fridge. I also found when I used psyllim husk vs psyllium husk powder the texture the next day that of bread and not at all mushy.


Collard Wraps! Raw! Vegan! Gluten Free! Delish!

Collard Wraps are one of my go to lunch staples for work, flights or the beach...I find four or five wraps usually fills me up and gives me gorgeous energy. I looooove when people come up to me at my airport gate and ask me where I bought em and I have to tell them I brought them from home. This collard wrap recipe is full of protein, nutrients and fiber. My collard wraps are an anti inflammatory food that will fight disease and keep your waistline cute. Don't skip the sprouts...they are like natures multi vitamin!

Ingredients for the Wrap

Raw collards - one bunch

Carrots

Watercress

Sweet Pea Shoots or any other Sprout you like

Red or Orange bell pepper


Ingredients for the Nut Cheese Spread

1 cup of RAW almonds (soaked overnite)

1 big bunch of fresh basil (approx 25 leaves)

1-2 limes

Sea Salt

Olive oil or flax seed oil.


Directions

Soak 1 cup of raw almonds overnight in a glass bowl (soaking in plastic raises your estrogen as plastic emulates estrogen in our bodies. For women that leads to anything from big hips to breast cancer and for men it leads to anything from man boobs to prostate cancer). The next day drain, rinse and throw your almonds into a vitamix or food processor.

Tear or cut up a big ole bunch of fresh basil and throw that in.

Squeeze the juice of one lime (sometimes two depending on your taste) into the vitamix and add some sea salt (to taste). I personally love a lot of salt in this recipe.

Now drizzle olive or flax seed oil in. I suggest about 1/4 of a cup although I am not one to measure everything. Instead I add things in slowly until taste and texture are right. Blend, blend, blend.

If you are using a vitamix you will need that black additional plunger piece to encourage the mixture to blend. Add more oil or a splash of water if its not being cooperative, careful you keep this like a hummus texture not a soup consistency.

De-stem each collard which will effectively give you two wraps for every collard leaf! This means you cut the stem out by slicing down the right side of the stem then down the left side of the stem tip to tip.

Use a mandolin or very sharp knife to shred your carrots and peppers.

Rinse and set aside your watercress and sprouts.

Trust me you need the sweetness of carrots and orange bell pepper to offset the bitterness of collard and spicyness of watercress...together all these flavors blend PERFECTLY!

Now take a big heaping tablespoon of your almond "cheese" and spread it on each collard leaf on the non shiny side of your collard. In the center of your collard place a little bit of each of your shredded veggies and your watercress and sprouts. Now roll like a burrito, tucking one end of the collard on the inside of the roll and set aside.

Tip: when you take these to-go lay your wraps shoulder to shoulder in a small glass container with lid or wrap tightly in tin foil...they will fall apart if you try to travel with them in a zip lock baggie.

Now lets say you are just getting back into self care and the ingredients I am suggesting sound just a little to plant based for you. Honey just de-stem those raw collards and instead do mayo, salt, pepper, turkey, cheese and lettuce...or egg salad or tuna salad. The collard is great way to get some carbs out of your life via bread and wraps and an even smarter way to get in more veggies.


Vegan Chipotle Aioli Dipping Sauce for Yucca Fries!

If you have swapped french fries for the lower carb and lower glycemic paleo version the yucca fry (recipe here on my website) then you MUST make this dipping sauce!

Ingredients

1/2 cup of veganaise

1-4 dried chipotle peppers ground in coffee grinder OR a tablespoon of previously ground chipotle powder.


Directions

In a mixing bowl blend the above ingredients with a spoon. Add the chipotle slowly as you taste so you achieve the level of smoky/spicyness that works for you.

Done.

Really.

That's it.

Now go dip your yucca fries in your awesome, easy, vegan, gluten free chipotle aioli.

Cauliflower Pizza!!!!!! Gluten Free Pizza!!!! Pizza that will blow your mind!

The Coveted Cauliflower Pizza     

                     Recipe

I am big believer in the 80/20 rule. This means 80% of the time you are eating well and infusing health into all areas: internal monologue, fitness, creativity, relationships, finances, career, food etc. But 20% of the time you might want to get a lil rock n roll. I call it a treat, some call it a cheat.
I like to make the healthiest choice in any given circumstance. Soooo, if I am craving pizza like a mofo; I make the healthier version: cauliflower pizza! Cauliflower pizza,  since it's not made from flour will have no effect on your blood sugar or insulin. As I teach all my clients: every time you eat sugar or anything made from flour your blood sugar and insulin skyrockets. The more insulin you make, the more fat you store. So you can see why cauliflower pizza is a "better than" choice cuz its "better than" eating a flour crust. Instead you are eating a pizza made largely from a plant!
Usually I post easy, healthy recipes for busy peeps. This one is a tad more labor intensive but worth every mind blowing bite. Make it for someone whom you hope will fall more in love with you. It works every time.  xxx-ooo Galadriel
 

INGREDIENTS

For Crust:
• 1 head of cauliflower roughly chopped and "riced" OR 2 bags of organic, frozen riced cauliflower by the Whole Foods in store brand.
• 1 egg
• 1/4 cup organic Mozzarella
• Garlic Powder, Onion Powder, Basil, Oregano.

For Toppings:
• Tomato Sauce
(make sure there is no added sugar or any oil other than olive)
• Organic grated cheese
• Fresh basil, jalapenos, black olives etc. Get creative!


PREPARATION INSTRUCTIONS

Roughly chop the cauliflower then toss small batches into a food processor/vitamix/blender to "rice" the cauliflower. A food processor works best. Your cauliflower will literally take on the shape of rice. Don't over process or you will end up with cauliflower that looks like mashed potato...which is another delish recipe you can find here on my website!

Just barely cover your riced cauliflower with water in saucepan and bring to a boil for about 7 minutes or you can steam it.
Drain well and let it cool to room temp.

If you are using the frozen riced cauliflower dump two bags into a non stick skillet and sautee until small portions have turned golden.

Once cool, toss the cauliflower in small amounts into a nut milk bag or cheese cloth to S Q U E E Z E out every bit of moisture from the cauliflower, then set aside in a bowl. This is quite literally the most important step in the recipe and the far most laborious. If you do not get out every bit of moisture you will end up with pizza casserole not pizza crust.

*helpful hint...when I make cauliflower pizza crust I cook, drain and squeeze the cauliflower early in the morning so it has all day to dry out a bit more.

Add to your now dry cauliflower: one egg, 1/4 cup of shredded mozzarella, garlic powder, dried basil and oregano. Mix well. Sometimes I now let these balls of cauliflower pizza dough sit overnight in the fridge and cook them the next day...if time does not allow that's a-ok.

Pre-heat your oven to 500.
Lay a piece of parchment paper onto a baking sheet. Not only does parchment paper help the crust dry out more but it makes cleaning that pan a snap.

Using your hands shape out your crust onto the parchment paper. I like a traditional round pizza.

Bake until your edges become quite golden...I find this takes about 20 ish minutes.

Remove the crust from the oven and it's time to dress your pizza. Start with your sauce, add your cheese then top with whatever your little heart desires.

Put your pizza back in the oven and bake for about 10-15 minutes until your cheese is melted.

PS, I always double this recipe and make one pizza per person. One pizza makes 4 small slices.

Enjoy!!!!!!

Grown Up Tang -aka the anti inflammatory beverage.

Why is everyone talking about Turmeric? Because turmeric is one of the most anti inflammatory root veggies you can use. Turmeric is used in nearly every dish in India and they have one ofthe lowest rate of cancer in the world. Why is everyone so concerned about inflammation? Because inflammation is ground zero for all disease especially the Big C. Food is our first line of defense in fighting disease. Now you can't eat processed frankenfood and think this beverage is the cure. However, if you use this turmeric drink in combination with a diet that is 80% plants you will be living in the healthiest version of yourself. Turmeric fights inflammation that causes disease, joint issues and skin issues. This is also a great drink for athletes who need some joint support!


So how do ya make it. Easy breezy. This is a recipe of 2's.

In a sauce pan combine:

2 cups of cold water

2 tablespoons of powdered or freshly grated turmeric

2 pinches of cardomom

2 lemons juiced

2 teaspoons of raw honey.

Bring to a simmer, stir to be sure honey is dissolved. Then let it cool.


Once cooled pour through a sieve/strainer/cheese cloth into a large jar so you are drinking a liquid and not turmeric powder. At this point I usually water it down a bit more cuz I like a lighter glass of sunshine but taste it before you do that. This can be served just as is or do half turmeric beverage, half seltzer.  Keep it in the fridge for up to a week. Enjoy!


Vegan Caesar Salad

I adapted this gluten free, vegan, plant based recipe from health guru, Kris Carr. If you have not read her book, Crazy Sexy Diet please order it today! Her book is the easiest how to on getting healthy and reads like your cool older sister is giving you advice.

Like 98% of the recipes I post...this takes 5 seconds to make and it's a real crowd pleaser at dinner parties.

In a bowl or glass measuring cup mix:

3/4 cup of Veganaise

1 tablespoon of dijon mustard

the juice of one lemon

2 tablespoons of nutritional yeast

a splash of water

a splash of olive oil or flax seed oil

tons of ground black pepper.

Mix the above all together and this is your gorgeous caesar dressing.

Pour over chopped romaine. ( I like a mix of romaine and arugula) toss to evenly coat the leaves.

You can enjoy just as is but I like to serve mine covered in dulse flakes and topped with toasted pumpkin seeds, chopped avocado and red pepper flakes. I even occasionally will serve with baked tofu. If you know someone who eats meat but is lactose intolerant this salad would be divine for them topped with chicken!

btw toasting a raw seed like pumpkin is so easy..literally throw the seed into a dry pain over medium heat and stir until you see a little bit of black forming on the seed...soooo delish and great source of zinc.


Galadriel's Signature Smoothie

I drink this smoothie daily as it gives me major energy. My mouth thinks its a milk shake but my body thinks it's a salad. It fills me up for hours and hours and is a great post work out refuel. My signature smoothie is the perfect combo of protein and good fat. The protein and good fat combo is your best friend because it keeps your blood sugar stable. When your blood sugar is kept stable you don't crash, cravings don't overcome you and you don't gain weight. I love this smoothie so much I even pack a magic bullet blender in my suitcase so I can make it when I travel.

In a vitamix or magic bullet or blender:

serves two

2.5 frozen bananas

3 tablespoons of raw cacao

1 tablespoon of milk thistle powder

1 tablespoon of spirulina or cholrella powder

1-2 tablespoon of nutbutter (almond or sunflower seed is best)

1 huge handful of raw organic spinach

Fill half way to 3/4 full with nut milk or water or what I love is a half nutmilk, half water combo.

You can add 10g of protein to the smoothie with 3 tablespoons of hemp seeds blended in


Bananas are great post work out food cuz they are full of potassium which replenishes your electrolytes...this is also why they are great hangover cure, not that any of you ever consume adult beverages. They are also high in fiber. Make sure they are brown spotted before you peel and freeze in a gallon size zip lock bag.

Raw Cacao powder is chocolate before it got processed and is a major superfood.  It kill your sugar cravings, has more iron than any other plant, more calcium than milk, is an anti depressant and is full of magnesium which will relax overworked muscles and help you poop on the regular. I like the brand Navitas Naturals, I get mine on Amazon.

Milk Thistle Powder helps replenish and rejuvenate your liver. Your liver has to process every toxin in your world from pesticides to medications to the chemicals in your shampoo to your negative emotions and it burns your fat. That liver never gets a break so keeping it uber healthy is to your benefit in the energy, great skin and weight departments. I like the brand StarWest Organics. I get mine on Amazon.

Spirulina or Chlorella Powder are also super foods cuz they contain more protein than steak are full of iron and lots of vitamins and amino acids and are totally detoxifying to your body! Ps the raw cacao and nutbutter will mask the distinctive not so gorgeous flavor of the spriulina or chlorellaI like the brand StarWest Organics, I get mine on Amazon.

NutButter. When you buy nutbutter be sure to read the ingredients and make sure that whore sugar isn't in there and that they didn't add some weird oil. I love an almond butter or sunflower seed butter. I don't advocate for peanut butter as it naturally contains a toxin called aflatoxin that is uber hard on your liver and is cancer causing. I myself only eat it a few times a year. Nutbutter is both protein and good fat! Trader Joes always has a reasonable priced raw almond butter!

Spinach and all green leafy veggies are like money in a high interest savings account. You really cannot do anything better for your health other than loading up every meal with green leafy veggies. Spinach is nutrient dense, fights cancer and is detoxifying to your body...no fat, no cholesterol just vitamins. Use organic cuz your body can't deal with pesticides!

Nut Milk is yet another awesome source of protein and good fat. I like to make my own cuz the boxed ones contain all kinds of hydrogenated oils and carrageenan which can be hell on your stomach. I use the boxed once in a blue but not on a regular basis.


Mini Egg Frittatas

These mini egg frittatas (paleo, gluten free) can be made on Sunday when you do food prep then breakfast is ready to grab and go all week. Cook once, eat 5x! My whole deal is to spend less time in the kitchen and spend more time living! Food prep is the awesome way to have healthy things ready to go, easy breezy! The cool thing about these egg frittatas is you can literally make them from whatever you have in the fridge that's about to expire...did you recently roast veggies or have some meat you would like to add...toss em in! This recipe is simple, easy and fast which is the name of the game. Spend 30 minutes chopping and cooking and breakfast is done for the week! These are also a great post work out snack to refuel! Here is my fave version....

Ingredients:

1 dozen eggs for 12 frittatas (enough for 2 peeps for 5 days)

1/2 bag of frozen organic spinach

1 organic zucchini

1 small yellow or sweet onion

 handful of fresh basil

1 jar of Trader Joes Tomatillo Sauce. (delish w/out too)

muffin pan or individual disposable muffin tins.

Directions:

Cook your spinach according to directions on bag followed by straining well to remove excess moisture.

In a non stick pan add olive oil or ghee and saute your finely diced sweet onion until translucent.

In a large bowl prefarably with lip for easy pouring break all eggs.

Add to the eggs finely diced zucchini, finely chopped basil, and half a jar of tomatillo sauce, now add your spinach and onions.

Mix well. Salt and pepper if you so desire.

Pour into greased muffin tin or disposable tins (I prefer these as they are so easy to transport through out the week.)

Bake at 375 for about 20-25 minutes. They are done when you slide a knife into the frittata center and it comes out clean.

Let em cool before you transfer to an airtight container or zip lock baggie.

Enjoy!

Easy healthy breakfast.

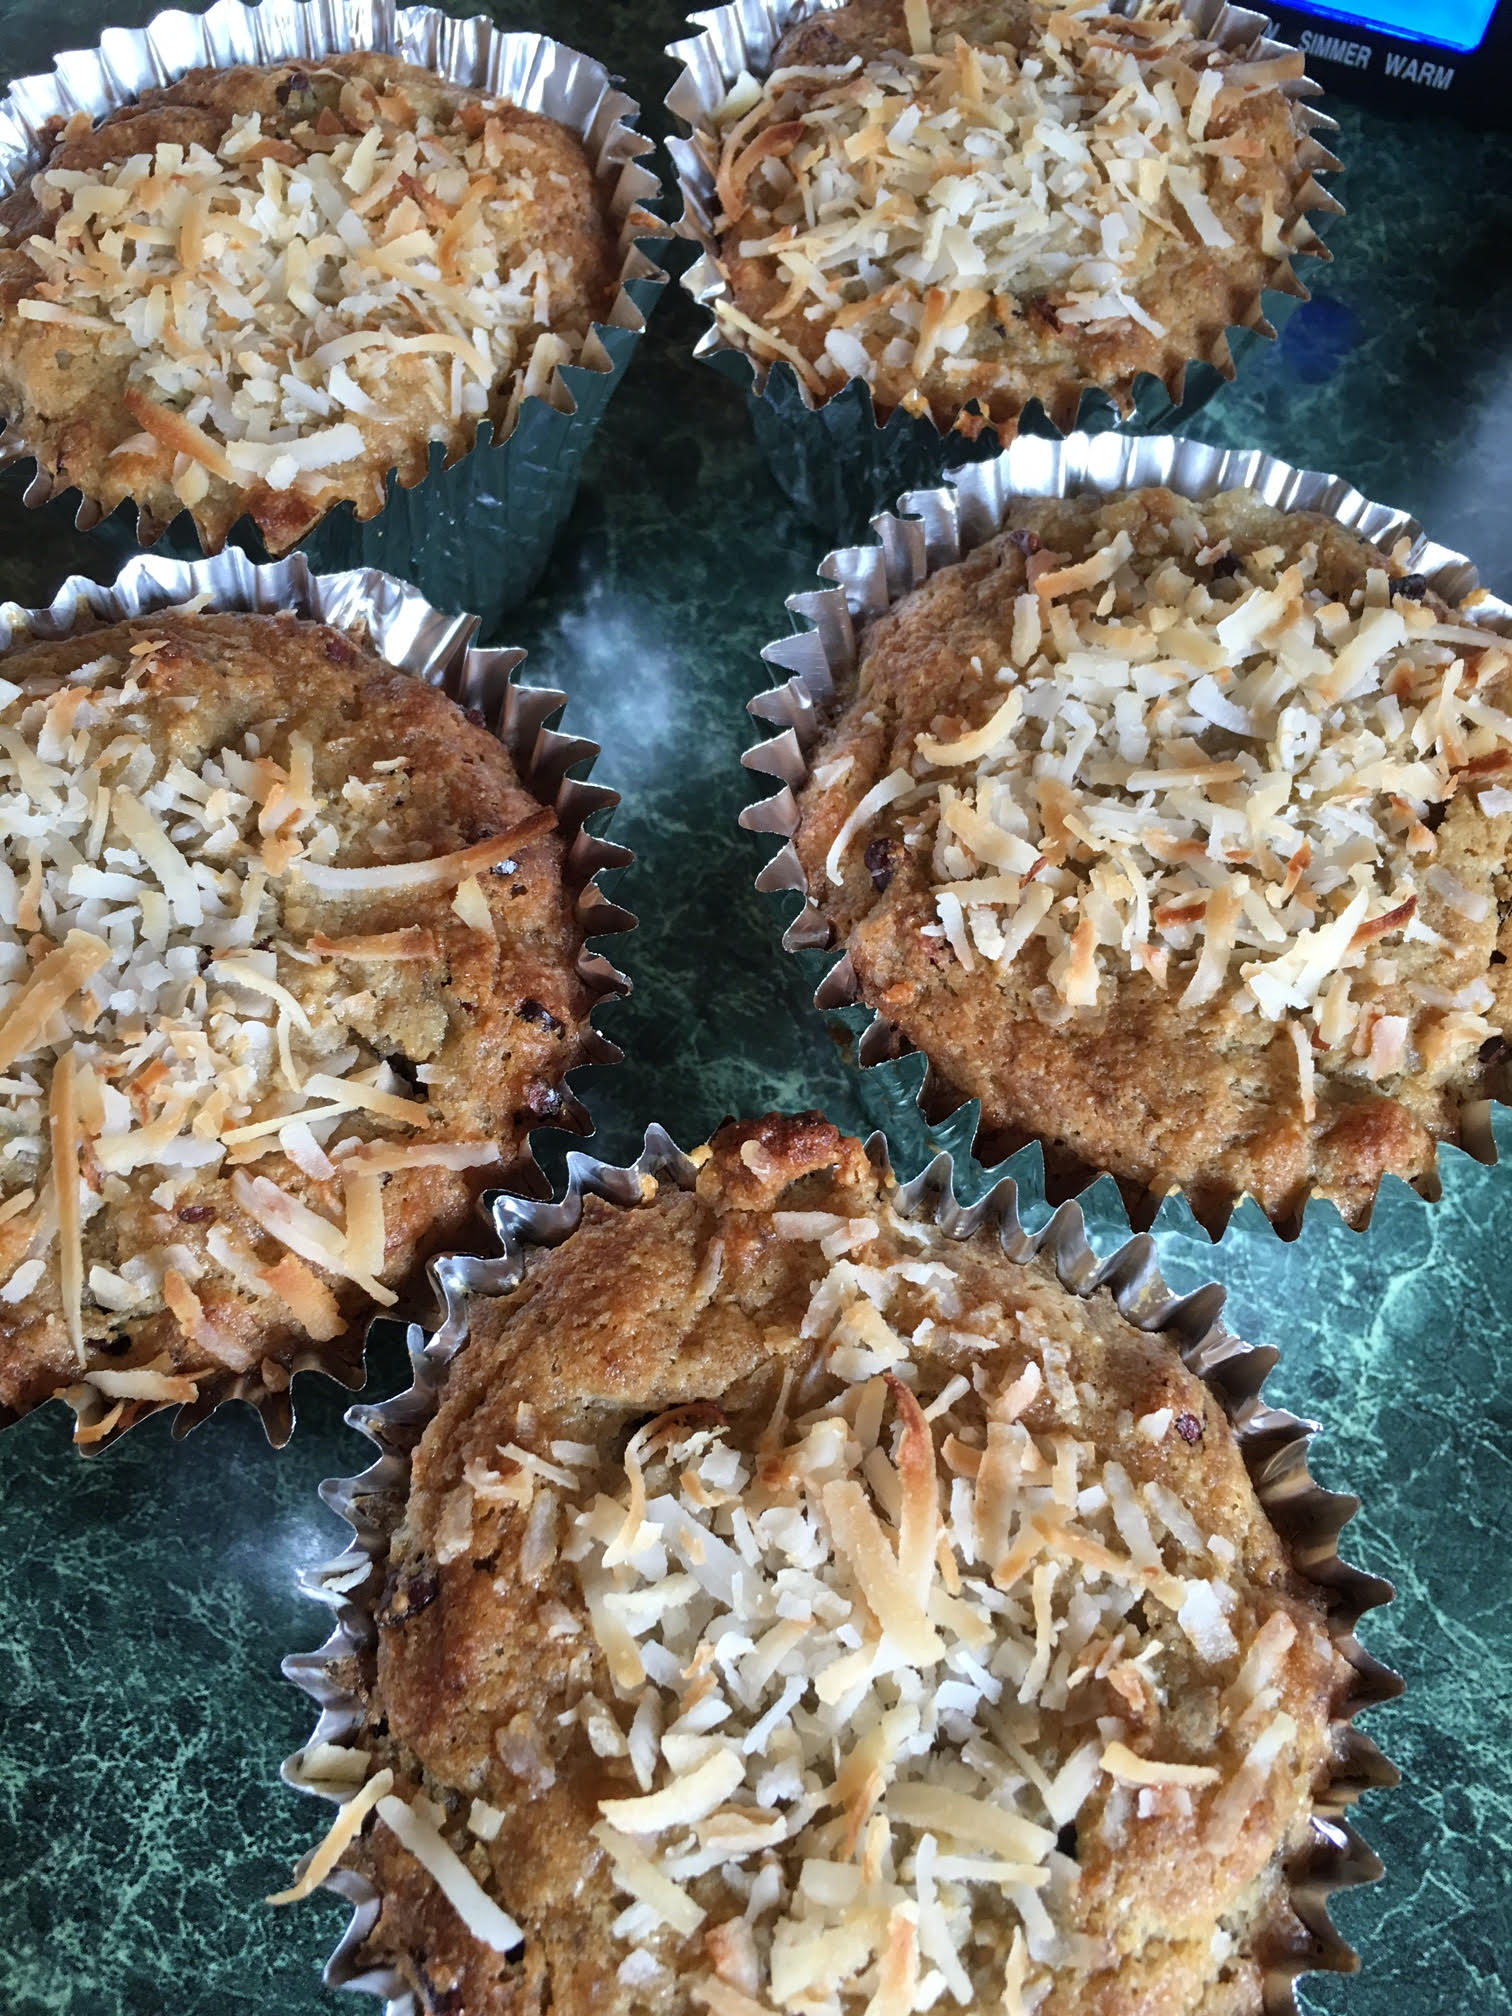
Paleo Bannana Muffins (gluten free!)

My favorite jewelry designer, Flavia Cardoso is known for her "delicate edgy" 14k gold pieces seen in everyone's ears in the fashion biz. She is one of those people who can turn a carrot and sarong into a gorgeous glamping tent on the beach. She has now applied that talent to paleo baking. These muffins are so fluffy and naturally sweet and insanely easy to make.

I love to suggest a paleo baked good to anyone who is breaking up with sugar. Why? Cuz all flours made from grains spike your blood sugar, increasing your insulin and causing you to store belly fat. Your body thinks flour is sugar. By saying #nobetch to flour and #yesbetch to almond or coconut "flour" (literally blanched and dehydrated and ground almonds or coconut) your blood sugar stays stable, you get lots of protein and good fat and you don't gain an ounce.


Ingredients

  • 2 ripe bananas (the ripper they are, the sweeter they are)

  • 1 1/2 cups almond flour

  • 1 tsp baking soda

  • 1 tsp vanilla

  • Pinch of salt

  • 2 eggs, whisked

  • 1/4 cup coconut oil, melted

  • 1/3 cup pecans or walnuts, chopped

  • Optional: dates for extra sweetness.

  • Galadriel's options : I added raw, unsweetened cacao nibs and unsweetened coconut as well as sliced almonds to mine.

Instructions

  1. In a small bowl smash the bananas

  2. Next add the eggs, vanilla and coconut oil to the bananas and stir until combined

  3. In a larger bowl, combine all the dry ingredients (almond flour, baking soda and salt)

  4. Pour the wet ingredients into the dry mixture bowl – stir into a batter

  5. Next add the chopped nuts or raw cacao nibs and stir well (save a couple of tablespoons of the nuts or coconut to top the muffins)

  6. Pour batter into a muffin tin lined with baking cups – fill each cup about 3/4 full

  7. Sprinkle remaining nuts or coconut on top of muffins and place in oven

  8. Bake at 350º F for about 22-25 minutes (oven times and temperatures will vary – test done-ness by inserting a toothpick, if it comes out clean, they're done)

  9. Store covered in fridge, or you can freeze these to enjoy later

zoodles with tomato sauce (dinner ready in 15 minutes)

When my clients break up with sugar and flour they ask me mournfully, what about pasta? Sure, gluten free pasta a few times a year is a nice treat. However, this plant based, whole food staple is something you can make once a week. I serve it at most of my dinner parties. The more you crowd out processed food with veggies, the healthier you will be...the happier your waist line will be, your skin will have fewer zits and less wrinkles, your joint issues will reduce and your energy and mood will improve. My credo is: every meal, every day is at least 80% plants. This dish of zoodles and tomato sauce with ground turkey is a great example of that. The meat isn't the star, the veggies are.

Zoodles

First spiralize your organic zucchini to create your raw zoodles. I suggest one zucchini per person. You can find a sprializer for under $40 on Amazon or your local kitchen store.

Sauce

Now prepare your sauce. If you wanna do homemade I will worship you but if you are a busy person like me, an organic jar one will do. I personally like the Whole Foods brand because it has NO SUGAR added, contains no hydrogenated weird oils and hello it's only 2.99.

 Saute onion, garlic, carrots (optional) in olive oil until the onions are translescent. If you want to add a lean protein like organic ground turkey this would be the time. Now add your sauce and dried or fresh oregano and basil as well as salt. You could even add a splash of red wine if you want.

Serve

Place a large handful or two of spiralized zoodles into individual serving bowls. (side note I usually cut them a bit as some zoodles can be up to 9 inches long)

Pour the hot tomato sauce over the raw, vegan, gluten free zoodles. Top with fresh basil. I also top mine with nutritional yeast which contains all the B vitamins and gives it a cheezy flavor. B vitamins fight depression and give you energy. Many of my dinner guests like to top theirs with freshly grated parmesan cheese.

As you know I love fast healthy meals and I love an easy swap, such as swapping pasta for zoodles. This meal is so hearty and filling you will feel so inredibly satisfied without feeling overstuffed.

side note: I hope you have leftovers cuz you will probs crave this the second nite too. In which case, store the sauce and zoodles seperatly. If you store them together they turn to slop.

Enjoy!